
A little over a week ago, I shared process photos of a landscape drawing from my sketchbook and was so surprised by the response! My drawing practice is something I really enjoy: it's creative, bite-sized, relaxing and satisfying, but I could not have imagined that it could inspire so many people. And that makes me very happy.
I like to experiment with different media, processes and styles, and this is an example of a process and scene that I've found very enjoyable recently. This week, I drew another landscape and took more photos to share the process in detail.
I hope that following this tutorial will help you experiment, try new things and develop your own process and style. Use the steps as a guide, but don’t be afraid to let your own style shine through!
Materials
For this landscape I used both water-based brush pens (Ecoline by Royal Talens) and colored pencils (Rembrandt Polycolor by Lyra). I also used an HB pencil for details on the house.

Please feel free to use whatever colors you have, after all, you're going to create your own piece. I used these not because I think they're the best or the only ones suited to use for this drawing, but simply because they’re the ones I have. And in fact, I'd like to have a warmer dark green brush pen, but I work with what I have.
Tutorial
Step 1
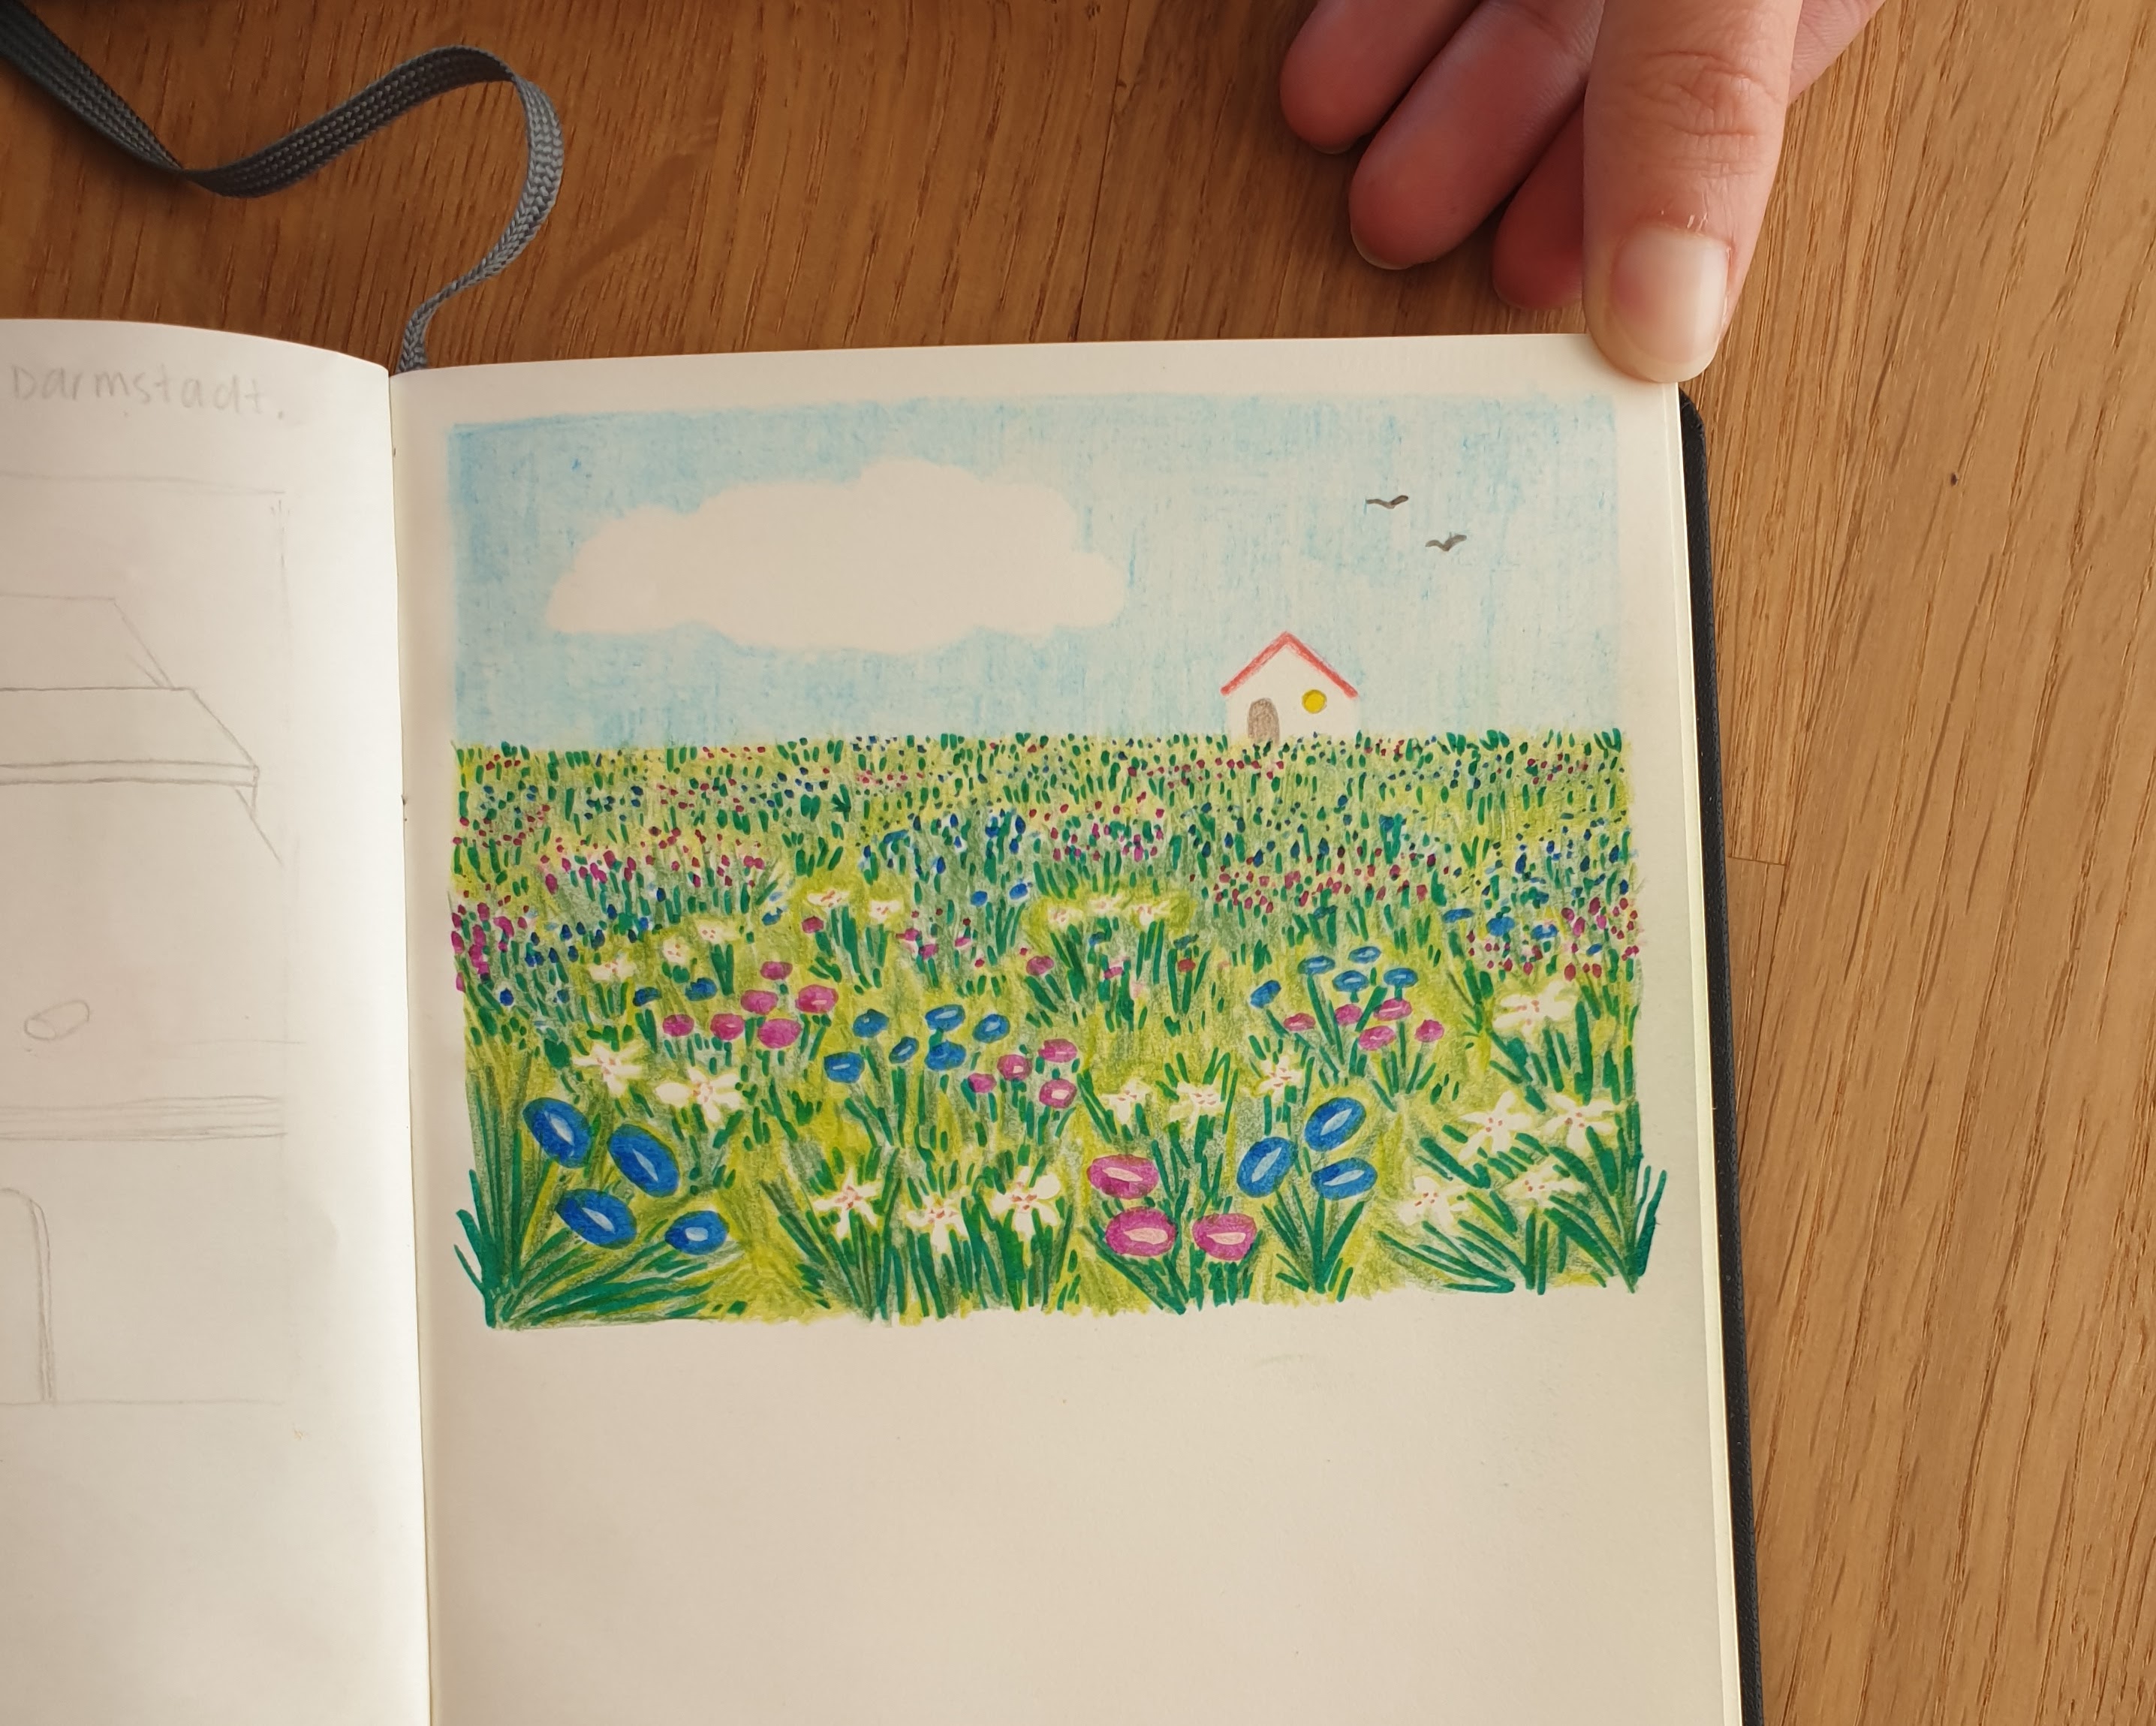
Before putting color on the page, the very first step is to decide the size and proportions of the drawing. For that, I made a quick sketch on another paper to map out the composition. My idea was for the meadow to occupy about 2/3 of the height, while the sky and house would occupy about 1/3.

Step 2
If needed, draw a rectangle to mark where the drawing will be. In my case, I kept the proportions in my mind and started drawing directly.
I started by drawing blue flowers with a brush, drawing circles that become smaller the further they are. I also outlined flowers with a green colored pencil, which I later used for the background. These flowers are white so I didn't color them in.

Then I added fuchsia flowers.

Step 3
With a dark green colored pencil, I gave the flowers stems and leaves. In this step I try to let go of trying to get the perfect shape, I let the pencil move in the directions that make sense, without thinking about every single line. I'm also careful not to draw over the white flowers.

Step 4
Then I fill the white spaces with light green, especially around the white flowers so they can start to stand out against the background.

After that I continued adding stems and leaves with the dark green.

Step 5
I finished filling in the blank spaces with light green and added a horizon line with yellow, though the light green would have worked well. I also added more flowers, but with colored pencils, as well as their stems and leaves.

Then kept adding more light green, and more flowers close to the horizon line.

Step 6
To color the sky, first I outlined the shape of the house with light blue, because the house would be left white. I did the same with the cloud and then colored in the rest of the sky.


Step 7
I added the details for the house with colored pencils and outlined the door and window with an HB graphite pencil.

Step 8
With a dark green brush pen, I added more defined stems and leaves to the flowers, I also tried to fill in any spaces that were left blank in the meadow. For the bottom right and left flowers I let the leaves go outside the drawing's limits for added depth.
I also added dots with the brush pens to the flowers at the back because I wasn't satisfied with them in colored pencil.

With a brown colored pencil, I added dots in the middle of the white flowers to suggest seeds or anthers.

Step 9
I added more dark green stems near the horizon, and then added more texture with the dark green pencil over the light green parts, to make it darker, add depth and detail. Finally, with a gray brush pen I drew two flying birds that balance the composition and complete the drawing.

I hope this tutorial was useful and inspiring! I encourage you to take this process and apply it to your own compositions. I also recommend you get inspired by different styles. I mainly go to Pinterest to get inspired by other people's work (but never to copy!!!). This drawing, for example, was inspired by these two illustrations below.
By Marc Majewski (left) and Hannah Flanagan (right):


I'd love to see how yours turned out! You can tag me or message me on Substack (@gispertnuria) or Instagram* (@nabiustudio or @gispertnuria) or send me an email.
*I'm not on Instagram as much anymore, I only check it about once a month, so it might take me a while to see it.

Share this post